 Save
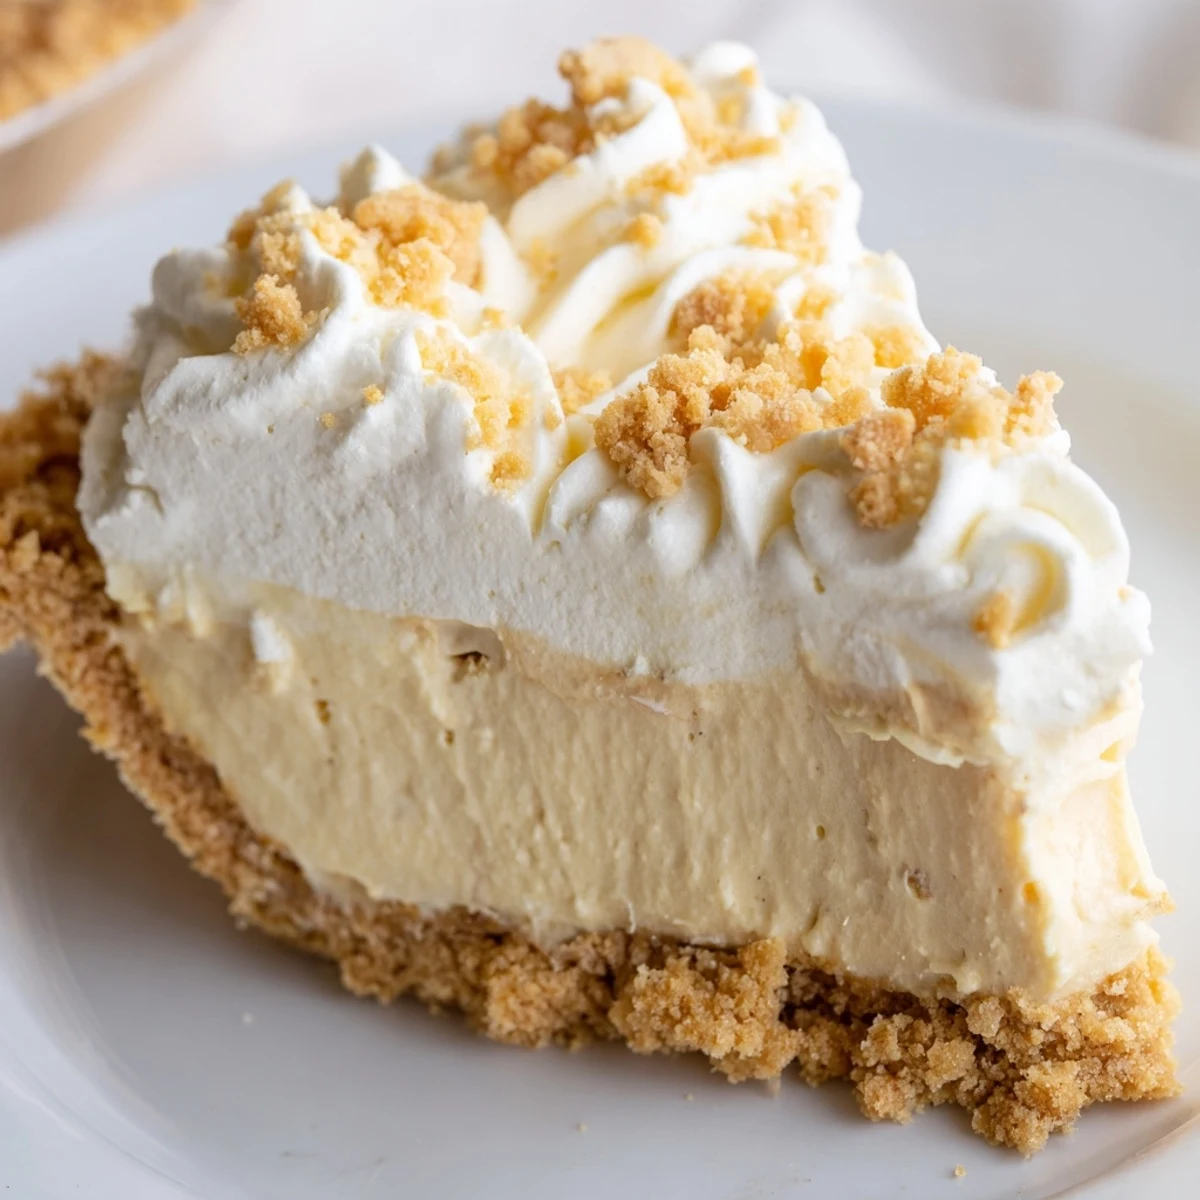
Save This old-fashioned Amish peanut butter dream pie combines a velvety, creamy custard-like filling with layers of peanut butter crumbs and freshly whipped topping. The rich peanut butter flavor shines through every bite, while the crisp pie shell provides perfect texture contrast. After just 25 minutes of preparation and a brief stovetop cooking time, this dreamy dessert requires chilling to set completely, making it ideal for preparing ahead. The result is an irresistibly smooth, comforting treat that embodies traditional Amish baking simplicity.
The first time I encountered this pie was at a roadside Amish bakery in rural Pennsylvania, where a handwritten index card taped to the glass display case simply read "PB Dream Pie" in faded blue ink. Something about the unassuming description drew me in, and one forkful of that velvety, peanut-studded cream later, I understood why it had earned such devoted fans despite never appearing on any fancy menu.
I made this for my fathers birthday one year when he was craving something old-fashioned and comforting. He took one bite, closed his eyes, and told me it reminded him of the county fair desserts his grandmother used to make, which is pretty much the highest compliment he could possibly give anything involving peanut butter.
Ingredients
- 1 9-inch prepared pie crust (baked and cooled): A good quality store-bought crust works perfectly here, though a homemade shortbread crust elevates it to company-worthy status
- 3/4 cup creamy peanut butter: Use a brand you love eating straight from the spoon since that flavor will shine through
- 1 cup powdered sugar: This creates the signature crumble texture that makes this pie so distinctive
- 2/3 cup granulated sugar: Sweetens the custard filling just enough without overpowering the peanut butter
- 1/3 cup all-purpose flour: The essential thickener that transforms milk and eggs into silky pudding
- 1/4 teaspoon salt: A tiny pinch that makes all the flavors pop and keeps things from tasting cloying
- 2 cups whole milk: Full fat is non-negotiable here for that rich, restaurant-style custard texture
- 3 large egg yolks: The backbone of the filling, creating glossiness and luxurious body
- 1 teaspoon pure vanilla extract: Rounds out the filling and adds that classic dessert perfume
- 2 tablespoons unsalted butter: Finishes the custard with velvety smoothness and subtle depth
- 1 cup heavy whipping cream: Whipped into clouds that balance the dense filling underneath
- 2 tablespoons powdered sugar: Just enough sweetener for the whipped topping
- 1/2 teaspoon vanilla extract: The finishing aromatic note on the cream topping
Instructions
- Mix the magic crumbs:
- Combine the peanut butter and powdered sugar in a medium bowl with a fork, working until the mixture resembles damp sand and holds together when squeezed. This will become both the hidden treasure layer and the snowy crown on top.
- Build the foundation:
- Press half of your peanut butter crumbs into the bottom of the cooled pie crust, creating an even layer that will surprise lucky forks with pockets of concentrated peanut butter flavor.
- Start the custard base:
- Whisk together the granulated sugar, flour, and salt in a saucepan until no lumps remain, then gradually stream in the milk while whisking constantly to prevent any stubborn flour clumps from forming.
- Cook until thickened:
- Set the pan over medium heat and whisk without pause until the mixture bubbles gently and coats the back of a spoon, usually about 4 to 5 minutes of devoted stirring.
- Temper the eggs:
- Whisk your egg yolks in a separate bowl, then slowly drizzle in about a half cup of the hot milk mixture while whisking furiously—this gentle introduction prevents scrambled eggs in your pudding.
- Complete the custard:
- Pour the warmed egg mixture back into the saucepan, return to medium heat, and cook for exactly 2 more minutes while whisking until the filling becomes glossy and thick enough to hold its shape.
- Add the finishing touches:
- Remove from heat immediately and stir in the butter and vanilla until the butter disappears completely, leaving behind impossibly smooth custard.
- Assemble and chill:
- Pour the warm filling over your crumb layer and let it cool for 15 minutes before refrigerating for at least 2 hours, though overnight is even better for flavors to meld.
- Whip the topping:
- Beat the heavy cream, powdered sugar, and vanilla until stiff peaks form, then spread this cloud over your completely chilled pie.
- Finish with flair:
- Sprinkle the remaining peanut butter crumbs over the whipped cream just before serving, creating that beautiful contrast of textures and announcing exactly what deliciousness awaits inside.
 Save
Save My neighbor asked for the recipe after trying it at our summer block party, and now it is her signature contribution to every neighborhood gathering. There is something about that first bite of cool, creamy peanut butter that makes people close their eyes and ask for seconds before they have even finished their first slice.
Make Ahead Magic
This pie actually improves with a little age, making it perfect for preparing the day before you need it. The flavors deepen and the texture becomes even more luxurious after resting overnight in the refrigerator.
Serving Suggestions
A simple drizzle of warm chocolate sauce over individual slices transforms this into an absolutely indulgent restaurant-worthy dessert. I also love serving it alongside a steaming mug of strong coffee or a cold glass of milk.
Storage Secrets
The pie keeps beautifully in the refrigerator for up to three days, though the crust may soften slightly over time. Cover it loosely with foil to prevent the whipped cream from absorbing any refrigerator odors.
- Use a pie server with a flat edge for clean slices that show off the beautiful layers
- Let refrigerated pie sit at room temperature for 10 minutes before serving for optimal texture
- Any leftovers can be frozen, though the whipped cream texture will change slightly
 Save
Save This pie has become my go-to for bringing comfort to friends who need it, because somehow peanut butter cream wrapped in a flaky crust says everything words cannot.
Recipe FAQs
- → How long does Amish peanut butter pie need to chill?
-
The pie requires at least 2 hours of refrigeration time for the filling to set completely before adding the whipped cream topping. For best results, chill 3-4 hours or overnight for a firm, sliceable texture.
- → Can I make this peanut butter pie ahead of time?
-
Yes, this dessert is perfect for preparing ahead. You can make the filling and crust up to 24 hours in advance. Add the whipped cream topping and peanut butter crumbs shortly before serving for the freshest presentation.
- → What type of peanut butter works best for this pie?
-
Creamy peanut butter works best for both the filling and crumb layers. Commercial brands like Jif or Skippy provide consistent results. Natural peanut butter may separate and affect the texture of the creamy filling.
- → Can I use a store-bought crust?
-
Absolutely. A 9-inch prepared pie crust, whether graham cracker or traditional pastry, works perfectly. Just ensure it's fully baked and cooled before adding the peanut butter crumb layer.
- → Why do I need to temper the egg yolks?
-
Tempering prevents the eggs from scrambling when added to the hot milk mixture. Gradually whisking small amounts of hot liquid into the yolks raises their temperature gently, ensuring a smooth, glossy custard-like filling.
- → How should I store leftover peanut butter pie?
-
Cover the pie tightly with plastic wrap or transfer slices to an airtight container. Store in the refrigerator for up to 4 days. The texture remains excellent, though the whipped cream may soften slightly over time.