 Save
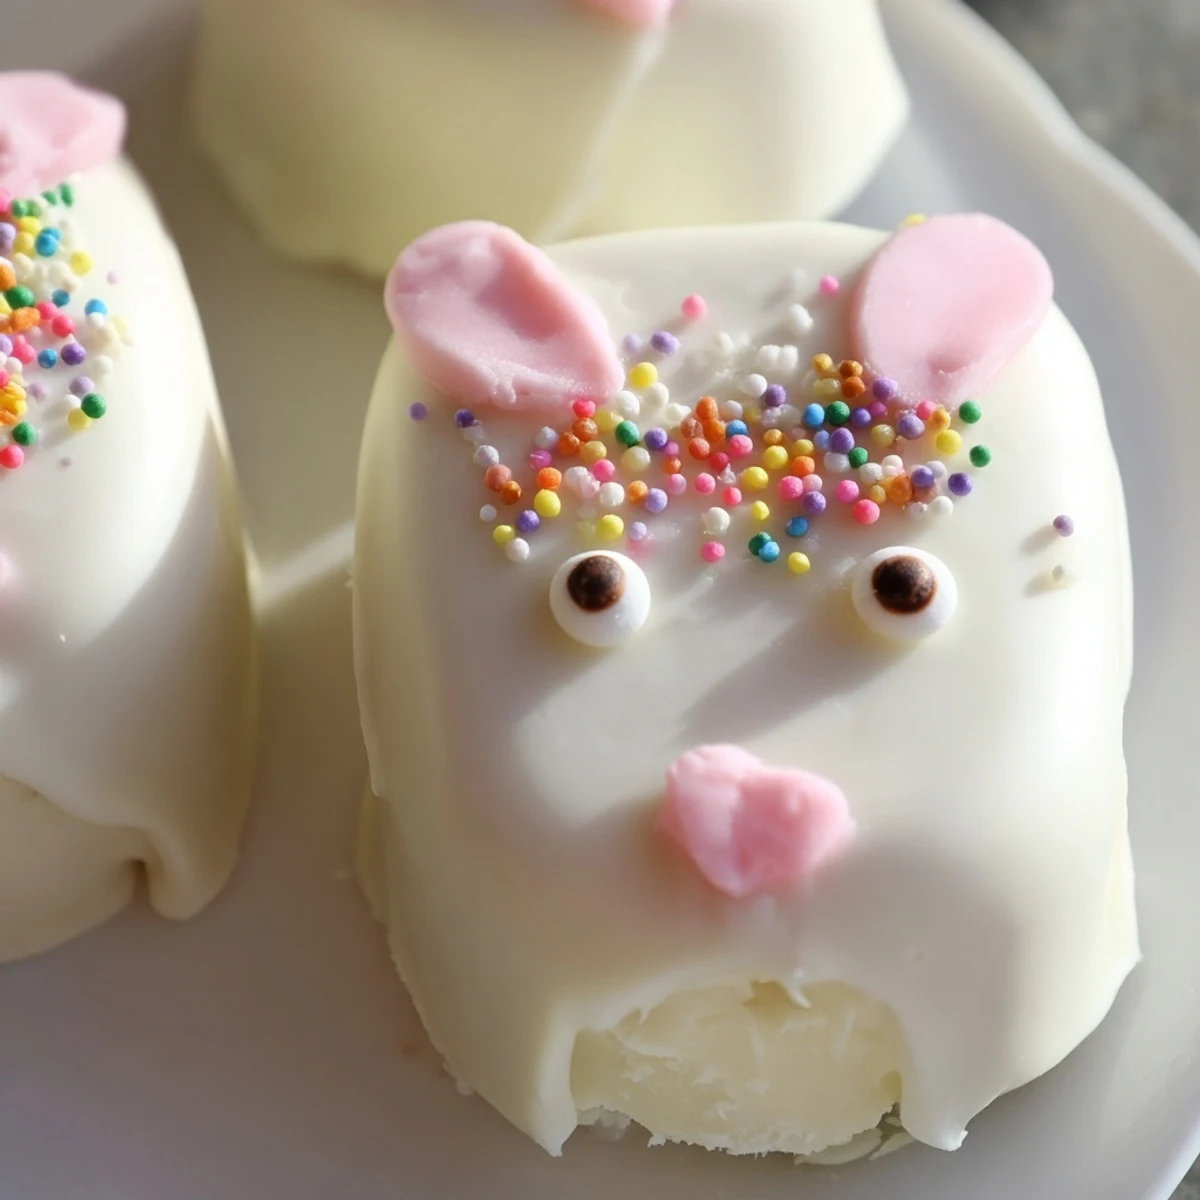
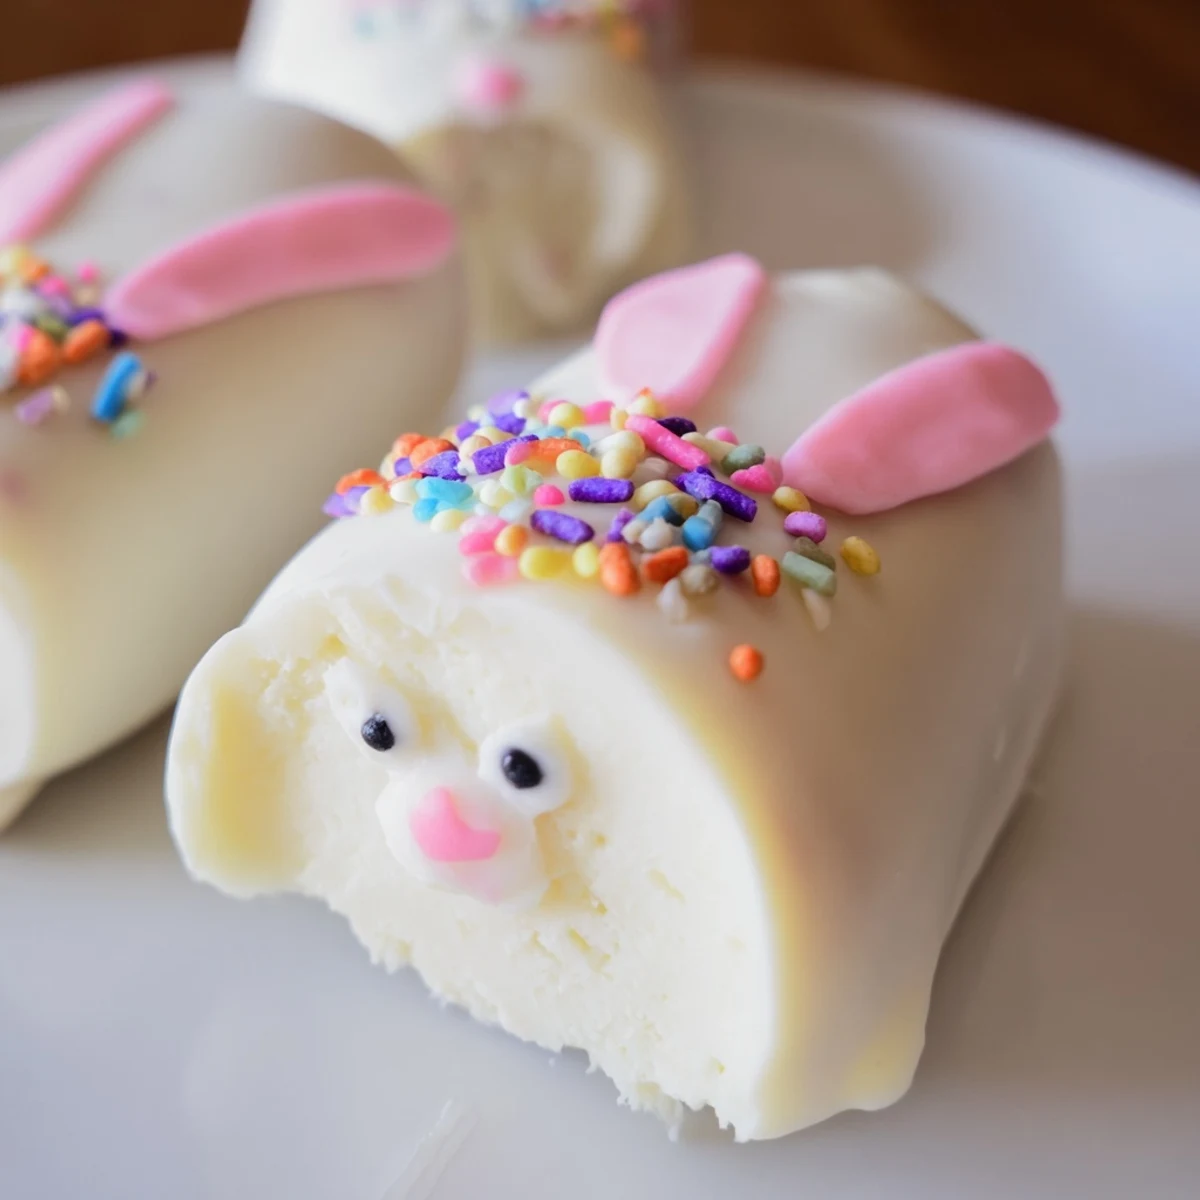
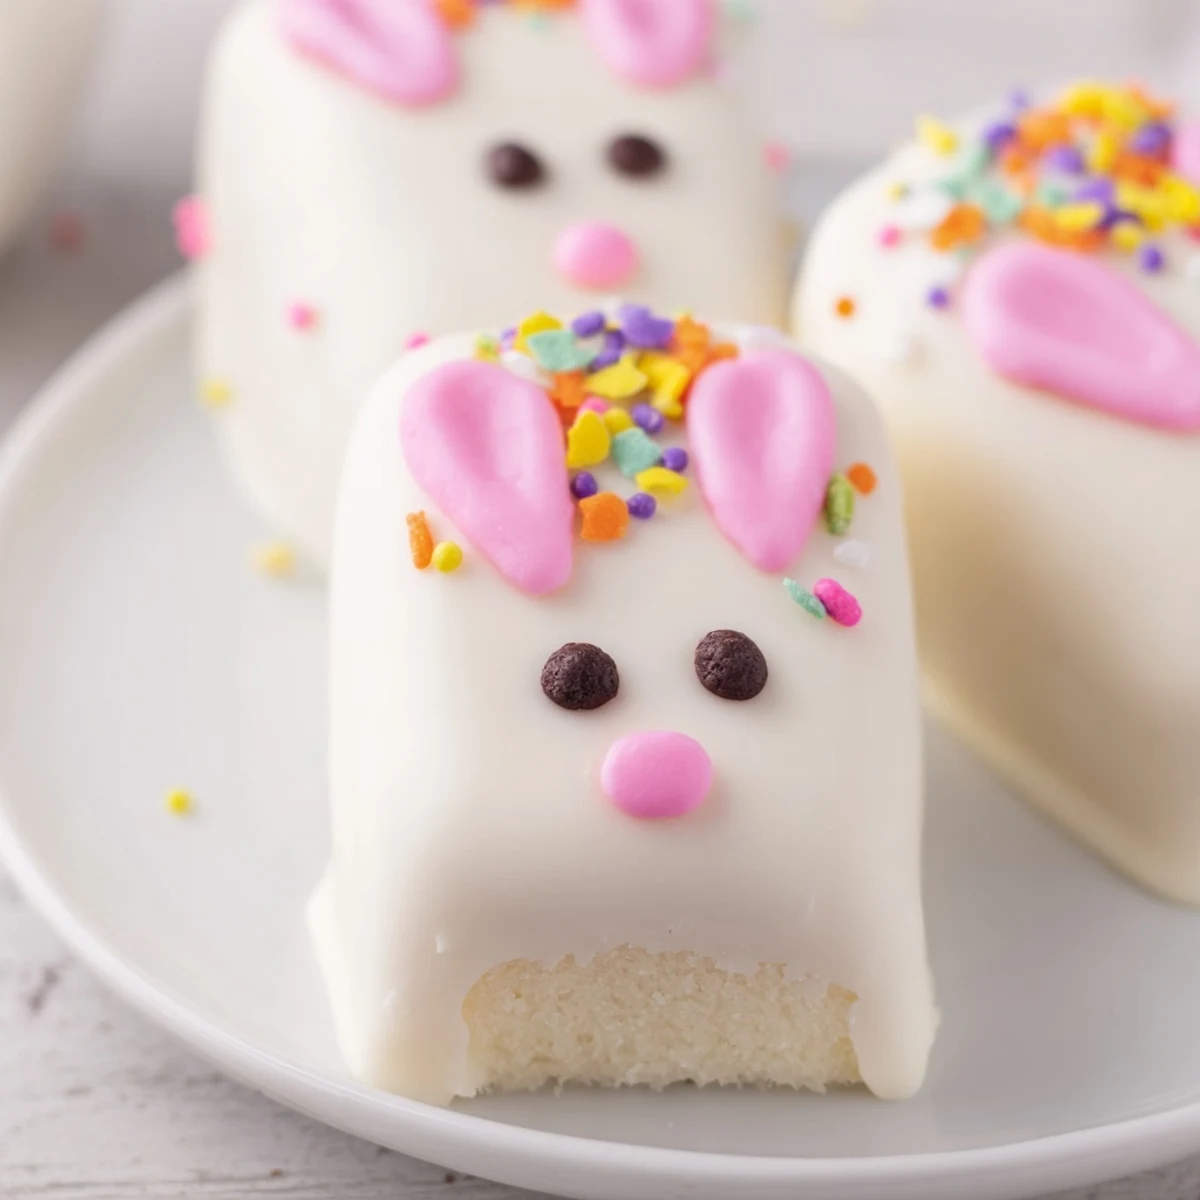
Save These delightful bunny-shaped treats combine moist vanilla cake crumbs with creamy white chocolate for an irresistible Easter dessert. The preparation involves mixing cake crumbs with cream cheese, butter, and vanilla to create a moldable dough, then shaping into adorable bunny faces. Each treats gets dipped in smooth white chocolate and decorated with colorful details like candy eyes, pink noses, and floppy ears. The result is a festive, handheld dessert that's perfect for spring celebrations.
The first Easter I made these bunny cakesicles, my kitchen looked like a pastel explosion had gone off. There were sprinkles everywhere, pink food coloring on my nose, and my kids were doubled over laughing as I tried to shape bunny ears that kept drooping like they'd had a very long day. But those imperfect, wobbly bunnies disappeared faster than anything else on the dessert table.
Last year I made a batch for my nieces Easter party and watched a room full of adults fight over the last bunny ear. Something about eating dessert on a stick brings out the competitive spirit in otherwise dignified people. Now I double the recipe just to maintain family peace.
Ingredients
- 1 cup vanilla cake crumbs: I have learned the hard way that stale cake actually works better here than fresh, so don not be afraid to use that slightly drying cupcake from two days ago
- 2 tbsp cream cheese: This is the secret binding agent that keeps everything together without making the mixture too soft or heavy
- 1 tbsp unsalted butter: Room temperature is non negotiable here or you will get lumps that refuse to incorporate smoothly
- 2 tbsp powdered sugar: Just enough sweetness to bridge the gap between cake and coating without becoming cloying
- 1/2 tsp vanilla extract: Pure extract makes a noticeable difference in the final flavor profile
- 10 oz white chocolate: Chocolate melts work better than baking bars because they are formulated for coating and set up beautifully
- Edible gel food coloring: Gel coloring won not seize your chocolate like liquid coloring can, which is a lesson I learned through one disastrous batch
- 8 cakesicle sticks: These are thicker than regular lollipop sticks and essential for supporting the weight of the cake and chocolate
Instructions
- Prepare the cake mixture:
- Mix everything in a medium bowl until the mixture holds together when you squeeze it, adding more cream cheese one teaspoon at a time if it feels too dry and crumbly
- Shape the bunnies:
- Divide into 8 equal portions and shape each into a flattened oval, pressing gently to compact the mixture without making it dense
- Add the sticks:
- Insert a cakesicle stick about halfway into each shape and press the cake mixture firmly around the base to secure it
- Chill thoroughly:
- Refrigerate for at least 20 minutes because cold cake pops are much easier to coat without falling apart or cracking the chocolate
- Melt the chocolate:
- Melt in 30 second bursts in the microwave, stirring between each burst until completely smooth and glossy
- Coat the bunnies:
- Dip each cakesicle into the chocolate, tilting to coat completely, then tap gently against the bowl edge to remove excess
- Decorate immediately:
- Add candy eyes, sprinkles, or fondant features while the chocolate is still soft so everything adheres properly
- Set completely:
- Let stand at room temperature for about 30 minutes or refrigerate for 10 minutes until the coating is firm and no longer tacky
 Save
Save These have become such a staple in our Easter celebration that my youngest now asks weeks in advance if we are making the bunny sticks again. The tradition started by accident but has turned into something I look forward to planning and executing every spring.
Making Them Ahead
I shaped and chilled the cake mixture the day before Easter one particularly chaotic year. The extra chilling time actually made them easier to work with, and having that step done reduced my holiday morning stress considerably.
Decoration Ideas That Work
After years of experimentation, I have found that simple decorations often look the most charming. Candy eyes and a pink nose made from a single sprinkle or dab of colored chocolate create these adorable faces that everyone finds irresistible.
Serving And Storage
These transport surprisingly well if you stand them up in a styrofoam block or jar filled with uncooked rice. I learned this after arriving at a potluck with a flat box of horizontally arranged bunny faces that had all slid to one side.
- Poke holes in a small cardboard box or use a dedicated cake pop stand for display
- Store in the refrigerator if the weather is warm or you are keeping them more than a day
- Bring to room temperature for about 15 minutes before serving for the best texture
 Save
Save These bunny cakesicles have become more than just dessert in our house, they are now the centerpiece of our Easter crafting time and the source of so many happy kitchen memories. Hope they bring just as much joy to your celebration.
Recipe FAQs
- → What makes these treats perfect for Easter?
-
The bunny shape and festive white chocolate coating make these ideal for Easter celebrations. They're handheld, adorable, and can be customized with pastel colors and spring-themed decorations like sprinkles and candy eyes.
- → Can I use different cake flavors?
-
Absolutely! While vanilla is classic, chocolate cake crumbs work beautifully with white chocolate. Lemon, strawberry, or red velvet also create delicious variations that pair well with the creamy white coating.
- → How far in advance can I make these?
-
You can prepare the shaped cake mixture up to 2 days ahead and keep it refrigerated. Dip and decorate within 24 hours of serving for the freshest appearance. Store completed treats in an airtight container for up to 3 days.
- → What if I don't have a cakesicle mold?
-
No problem! Simply shape the mixture by hand into flattened ovals or bunny face shapes. The key is ensuring they're thick enough to hold the stick securely. A mold just helps with uniformity, but hand-shaping works perfectly fine.
- → How do I prevent the white chocolate from seizing?
-
Melt in short 30-second bursts, stirring thoroughly between each interval. Avoid getting any water into the chocolate as even a drop can cause seizing. If it becomes too thick, add a teaspoon of vegetable oil to smooth it out.